

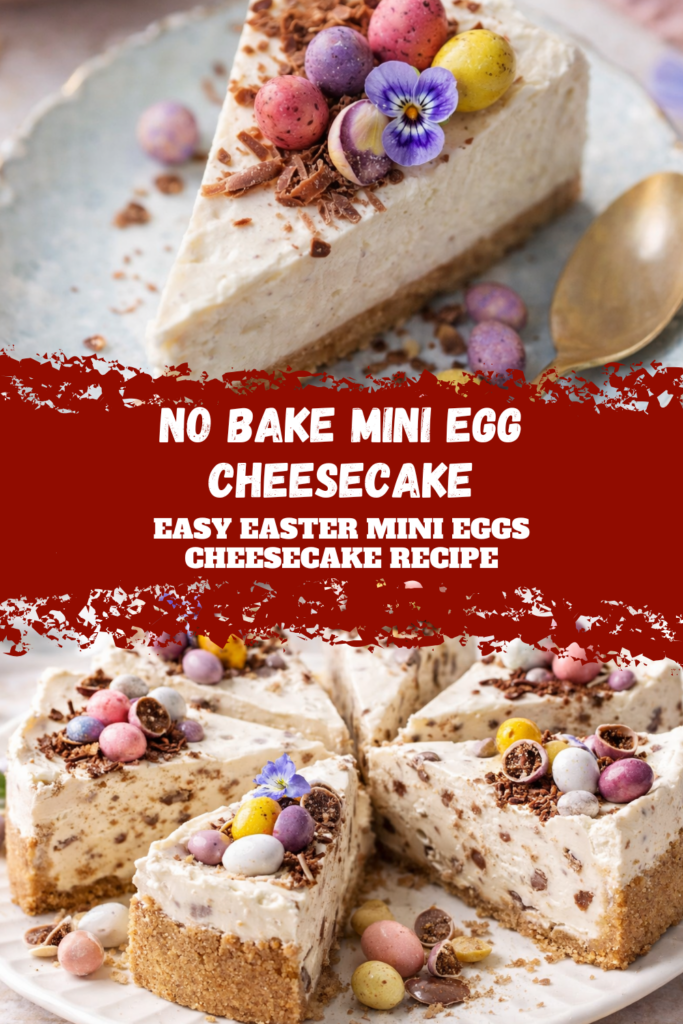
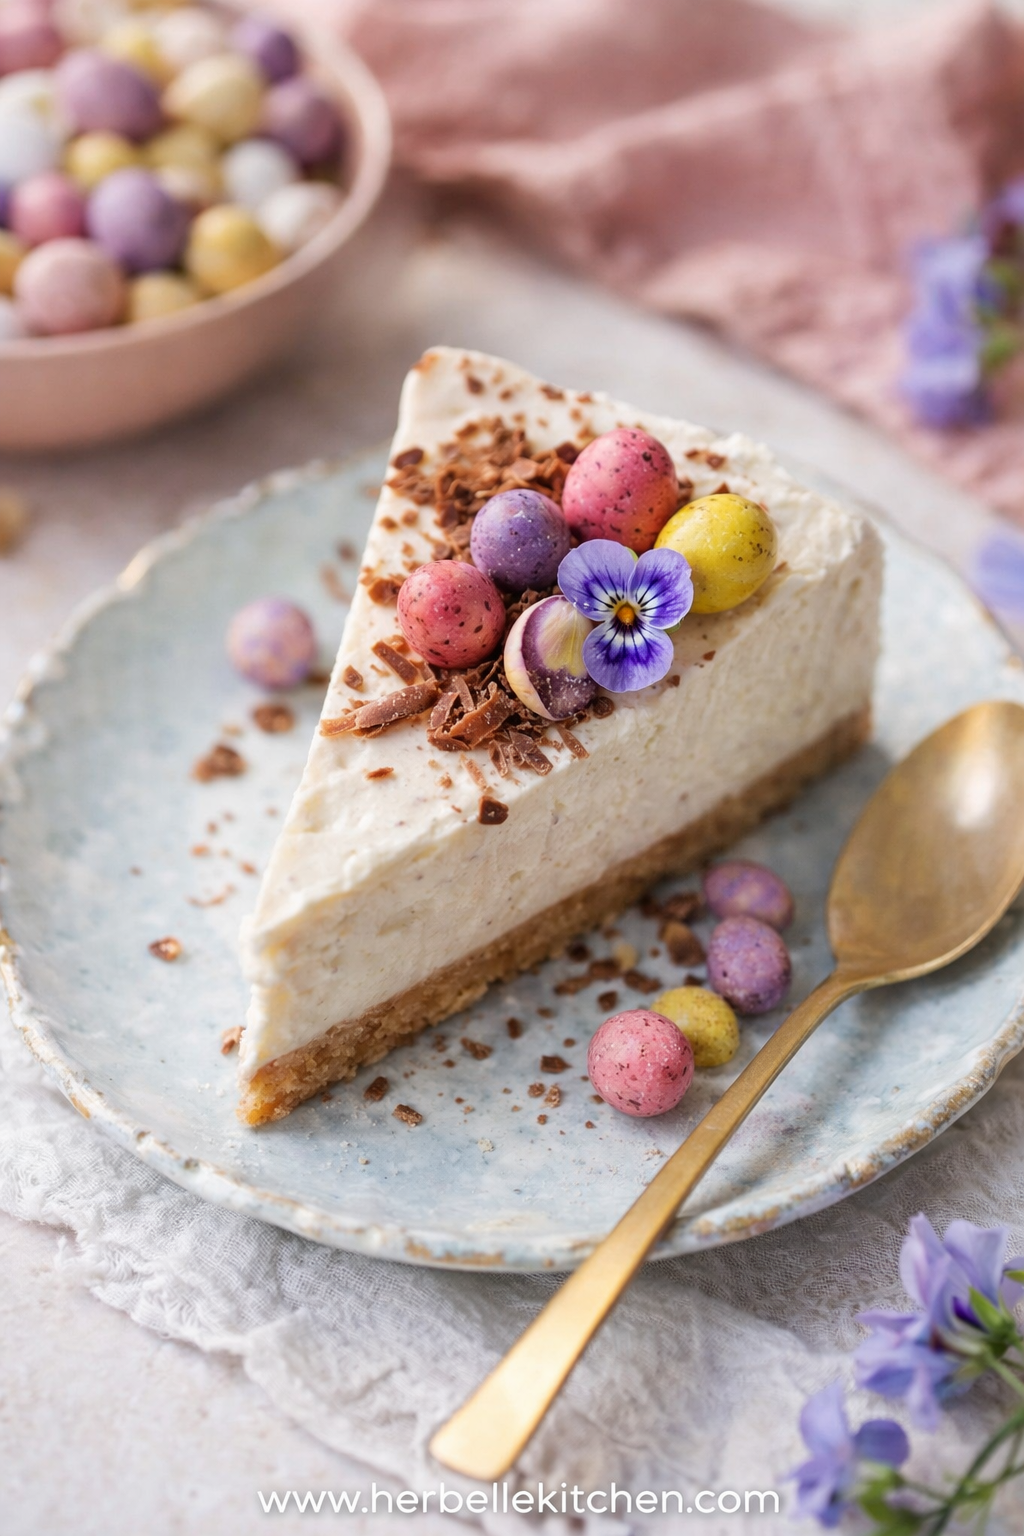
Springtime desserts don’t get much more exciting than this colorful, creamy Mini Egg Cheesecake. Imagine slicing into a silky vanilla cheesecake packed with crunchy chocolate mini eggs and sitting on top of a sweet, crumbly biscuit base. Sounds dreamy, right? This festive treat is the ultimate No Bake Mini Egg Cheesecake, which means you get all the indulgence without even turning on the oven. Honestly, desserts that require zero baking might just be the best invention ever. FYI—your kitchen stays cool and your dessert still looks bakery-worthy.
The magic starts with a buttery biscuit crust made from digestive biscuits (graham crackers work great too). Then comes the star of the show: a fluffy, mousse-like Philadelphia cream cheese filling with hints of vanilla. Crushed chocolate eggs fold right into the mixture, creating that irresistible texture contrast—smooth creaminess meets crunchy chocolate candy. The result? A decadent Mini Egg No Bake Cheesecake that tastes as amazing as it looks.
Once chilled and set, the fun really begins. The top gets decorated with even more colorful chocolate eggs, turning this dessert into a showstopper. It’s easy to see why Mini Eggs Cheesecake Recipes become instant Easter favorites. Between the vibrant toppings and creamy filling, every slice screams celebration.
Love easy desserts? This recipe delivers big-time. The Easy Mini Egg Cheesecake requires minimal effort yet looks stunning on any Easter dessert table. IMO, that’s the dessert trifecta—simple, delicious, and gorgeous. Even better, it’s a make-ahead dessert, so you can prepare it the night before and let the fridge do all the work.
Searching for fun holiday treats? This recipe sits right alongside other No Bake Mini Egg Cheesecake Recipes and festive Easter Mini Cheesecakes No Bake ideas. And sure, some people prefer a Baked Mini Egg Cheesecake, but once you try this creamy chilled version, you might never look back. One bite in, and you’ll understand why this Mini Eggs Cheesecake is pure Easter dessert magic.
Mini Egg Cheesecake – Easy No Bake Mini Egg Cheesecake for Easter Desserts
Ingredients
Method
1. Prepare the Biscuit Crust
Start by lining the bottom of a 9-inch springform pan with parchment paper.Place the digestive biscuits in a food processor and pulse until they become fine crumbs. Add the melted butter and blend again until the mixture resembles damp sand.No food processor? Put the biscuits in a sealed zip-lock bag and crush them using a rolling pin until finely broken. Transfer to a bowl and stir in the melted butter until fully coated.Tip the crumb mixture into the prepared pan. Press it firmly into the base and slightly up the sides to form the crust. Use the bottom of a measuring cup to compact the crumbs tightly—this helps the crust hold together when slicing.Chill the crust in the refrigerator for at least 30 minutes, or place it in the freezer for 15 minutes while preparing the filling.2. Make the Cheesecake Filling
Beat the Cream Cheese
Place the cream cheese into a mixing bowl. Using an electric mixer, beat on medium speed until the texture becomes smooth and creamy. Scrape the bowl occasionally to ensure everything mixes evenly.Whip the Cream
In a separate bowl, pour in the cold cream. Beat on medium-high speed until stiff peaks form. Set aside.Flavor the Cheesecake Base
Add the powdered sugar, vanilla bean paste, and salt to the cream cheese mixture. Beat again until fully blended and silky.Fold in the Whipped Cream
Gently fold the whipped cream into the cream cheese mixture using a spatula. Mix carefully so the air in the whipped cream stays intact—this keeps the cheesecake light and fluffy.Add the Mini Eggs
Crush about two-thirds of the mini eggs into small chunks. Stir them through the filling until evenly distributed.3. Assemble the Cheesecake
Remove the chilled biscuit base from the fridge. Spoon the cheesecake filling over the crust and spread it evenly across the surface. Smooth the top with a spatula.Cover the pan tightly with plastic wrap and place it in the refrigerator for at least 6 hours, though overnight chilling gives the best texture and firmness.4. Serve and Decorate
Once the cheesecake is fully set, run a knife gently around the edge of the pan to loosen it. Release the springform ring and transfer the cheesecake to a serving plate.Decorate the top with the remaining mini eggs. For extra flair, add chocolate shavings or edible spring flowers if desired.Notes
Helpful Tips
Use properly whipped creamWhipping the cream to stiff peaks helps the cheesecake hold its structure once chilled. Press the crust firmly
A well-packed biscuit base prevents crumbling when slicing. Remove excess moisture from tub cream cheese
If using soft cream cheese from a container, pat it dry with paper towels before mixing. Allow enough chill time
The cheesecake needs a minimum of 6 hours to fully set—overnight is ideal. Slice with a warm knife
Dip a knife in hot water, wipe it dry, and slice for clean, neat cuts.
Storage
Refrigerator:Store tightly wrapped for up to 3 days. Freezer:
Freeze the undecorated cheesecake for up to 2 months. Wrap well in plastic wrap and foil. Thaw overnight in the refrigerator before serving.